AlloyDB Integration Documentation
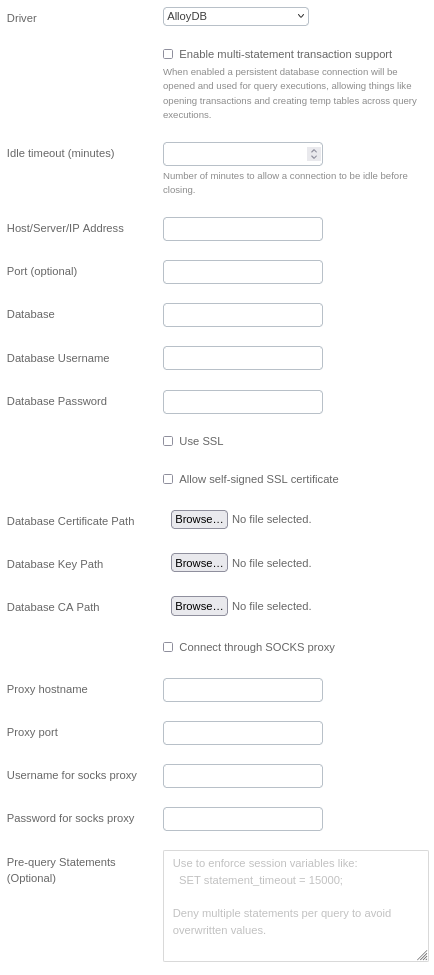
Table of Parameters
| Key | Description | Optional | Data Type |
|---|---|---|---|
name | Name of connection | text | |
driver | Must be AlloyDB | text | |
multiStatementTransactionEnabled | Reuse db connection across query executions | boolean | |
idleTimeoutSeconds | Seconds to allow connection to be idle before closing | number | |
queryTimeout | Seconds to allow any query to run before cancelling | number | |
host | Host/Server/IP Address | text | |
port | Port | Yes | text |
database | Database | text | |
username | Database Username | text | |
password | Database Password | text | |
ssl | Use SSL | Yes | boolean |
sslSelfSigned | Allow self-signed SSL certificate | Yes | boolean |
cert | Database Certificate Path | Yes | text |
key | Database Key Path | Yes | text |
CA | Database CA Path | Yes | text |
useSocks | Connect through SOCKS proxy | Yes | boolean |
socksHost | Proxy hostname | Yes | text |
socksPort | Proxy port | Yes | text |
socksUsername | Username for socks proxy | Yes | text |
socksPassword | Password for socks proxy | Yes | text |
Setup Information
To integrate AlloyDB with our system, follow these steps:
-
Select the AlloyDB Connector: Select the AlloyDB connector on import page in
Connectionmodal. -
Configure Connection Parameters: Use the parameters listed above to configure the connection to your AlloyDB instance.
-
Verify Connection: After configuring the parameters, verify the connection to ensure successful integration.
Connection modal

Additional Documentation
For more details and advanced configurations, refer to the official AlloyDB Documentation.
Support
If you encounter any issues or have questions, please contact our support team.